Deconstructed Layered Caffee Latte

Usually for New Years Eve, I get together with my friends in Norway, we make a feast and party in to the early hours of the new year. Great way to start of the year. I usually make the dessert, and this is my addition to this year’s party. I also made the other two courses of the feast for the small party of 30 guests. This dessert is inspired by the great Seattle Coffee bar’s, Slate Coffee Roasters, deconstructed latte. I find their roasting and selection of beans to lend a great addition to desserts. They usually have a lighter roast, full of aroma. You get the fruitiness and complexity of the bean and origin. If you are in the area, you should for sure check out their tasting menu. Best shared between friends or a partner, unless you are really jet lagged. This recipe makes about 6-8 small 200ml (8oz) paper coffee cups.

coffeedessert-000019
If you don’t want to serve it in a paper cup, you can always class it up a little.

Chocolate Sponge

95g Milk (Whole)
55g Vegetable oil
55g Egg white,
10g Egg yolk,
95g Sugar
55g Cake flour (Bleached)
25g Cocoa Powder (Valrhona Cocoa Powder – Roasted)
2.5g Kosher salt
2 N2O Cartridges (Cream chargers)
60g Espresso (Slate Coffee Finca San Luis)

Cut 3 small holes in the bottom of the paper coffee cup using a knife. I found it best to Combine milk, oil, and eggs to the blender and blend. Add all remaining ingredience and blend until smooth. Pour into a Whipping siphon and charge with 2 cartridges. The batter will raise a lot in the microwave. We want to create a layer that is about 3cm at the bottom of the paper cup. So we want about a little bit less than a 2cm of batter in the cups. The sponge will puff up in the microwave. Knock the cups on a level surface to make sure it is evenly dispersed. Knocking too hard will make the cakes sink together and not become airy and light. Cook in the microwave for 25-30 seconds. Pour table spoon of a freshly pulled shot of Espresso on the sponge once cooled. You can make this dessert gluten free by making this layer with the a dark chocolate cremeux. You can find a good recipe for that at my Secret Stash of Chocolate. Just swap the milk chocolate with a dark chocolate and the hazelnut liqueur with espresso.

White Chocolate Coffee Ganache

25g pour-over Coffee (Slate Coffee Kibugu Washed)
50g White Chocolate (Valrhona Ivoire 35%)

Bring the Coffee up to a boil. The coffee I used is very fruity and lends itself well to this preparation. To substitute I would recommend a light roast coffee that you like. Pour the coffee over the chocolate. Make sure you get every last drop. Stir until all the chocolate is melted. If you are not getting it fully melted, gently melt using a bain marie or microwave. Pour two table spoons of the mixture on top of the cooled sponge with espresso. This will soak into the sponge a little.

Latte Creme

50g Heavy Whipping Cream
75g Mascarpone

Mix Mascarpone with the milk until you have a smooth and no lumps. Pour two table spoons  of the mixture on top to the Coffee Ganache. Place the cup back in the freezer to set.

coffeedessert

Cold Brew Gel

200g Cold Brew Coffee (Slate Coffee All-Nighter)
1.3g Agar Agar

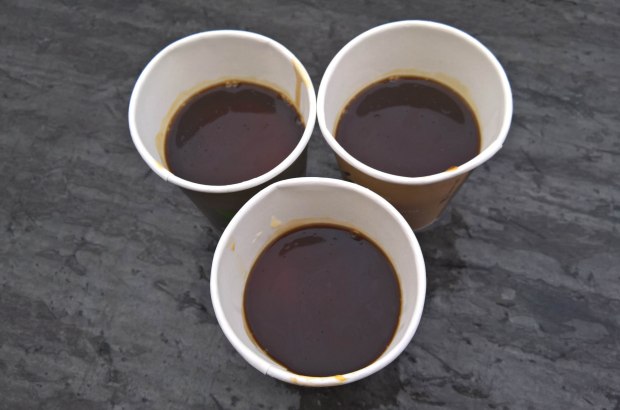
In a pot with the coffee add Agar Agar. Heat the coffee mixture to above 90c and make sure the Agar is stirred in well. Remove from heat. When the temperature drops to 50c, pour two table spoons of the liquid on top of the Latte Creme in the cup. Agar agar sets at 35-45c, and it sets rapidly. Place the cup in the fridge to set.

See you next time. Hungry Eyes Full Heart, Can’t Lose!

Secret Stash of Chocolate

As I have been on an Entremet kick lately I wanted to create another one, made only with the best chocolates from the deeps of my cabinet. Those that know me, know I have a chocolate shelf in my cabinet which is never touched. Just waiting to expire.And since it is Thanksgiving I wanted to hit it big. So there are 6 different textures and types of chocolate. This is a time consuming recipe, but much of the time is spent chilling layers. I used a SilikoMart Kit Lady Queen Savarin Silicone Mold. Consisting of a smaller and larger ring mold. Recipe is inspired by Savour School in Australia and their patissier competition. Kirsten have been very helpful with responding to my comments on instagram.

secretstashofchocolate-3580

Aerated Dark Chocolate Layer

150g Dark Chocolate (Valrhona Araguani 72%)
15ml Rapeseed oil (other neutral oil)

Melt and then temper the dark chocolate in a glass bowl over simmering water. I found this guide useful for this recipe. Heat the oil up to 30c and with the chocolate to a Isi cream whipper with one cream charge. Shake well. In the smallest mold in the kit, gently squirt an even layer of the chocolate mixture. Place on an even surface in the freezer to set.

White Chocolate Coffee Ganache

100g Heavy Cream
6g Coffee (Coarse Ground, Slate Coffee Kilenso Natural)
100g White Chocolate(Valrhona Ivoire 35%)

Bring the heavy cream with the coffee grounds up to a bowl, making sure the cream is not burning. The coffee I used is very fruity and lends itself well to this preparation. To substitute I would recommend a light roast coffee that you like. Prepare a  sieve with a cheese cloth. The cheese cloth will help strain the coffee grounds out, giving us a silky smooth texture. Pour the boiling hot cream into the sieve over the chocolate. Make sure you get every last drop. Stir until all the chocolate is melted. If you are not getting it fully melted, gently melt using a banmery or microwave. Just enough to melt the chocolate. Layer on top of the aerated dark chocolate layer, and place back in the freezer to set.

secretstashofchocolatelayers

Sour Cream Dulcey Chocolate Mousse

35g Egg Yolks
65g Egg Whites
75ml Heavy Cream
50ml Sour Cream
75g Dulcey Chocolate (Valrhona Dulcey 32%)

Whisk Egg whites to stiff peaks in a bowl. In another bowl whip the heavy cream and sour cream together to soft peaks. In a third bowl gently stir the egg yolks. Melt the chocolate, and once it is melted make sure it is not too warm as it will be slowly dropped into egg yolks. Whisk the egg chocolate mixture to fully incorporate making sure that you don’t scramble your eggs. Combine the cream and egg whites before very gently stiring it into the chocolate mixture. Important to take your time to keep as much air in the mixture as possible. Pour the mixture once it is fully incorporated into the mold on top of the white chocolate ganache. Place back in the freezer to set again.

Caramelia Chocolate Flourless Cake

18g Egg Yolks
18g Sugar
25g Caramelia Chocolate (Valrhona Caramelia 36%)
57g Egg Whites
18g Sugar
Flake salt (Optional)

Separate your yolks and white. Notice there is two portions of sugar, one portion for each of the egg mixes. Mix in a bowl the egg yolks with sugar until they are combined and turn white. Melt your chocolate, and slowly pour into the egg yolks. Make sure the eggs doesn’t scramble. In another bowl whisk the egg whites with the other portion of sugar until it creates firm peaks. Gently fold the egg whites into the chocolate mixture. Pour into a ring mold or make one using aluminum foil nicely folded. Lightly sprinkle some flake salt for some bursts of salt to enhance the chocolate. Bake for 13-14 minutes on 160c. Let it cool before you assemble on top of the Mousse layer. Place back in freezer to set. This finishes up the inside ring of chocolate layers.

secretstashofchocolatecremeux

Milk Chocolate Hazelnut Liqueur Cremeux

300g Heavy Cream
250g Milk Chocolate (Valrhona Jivara Lactee 40%)
60g Cocoa Butter
30g Hazelnut Liqueur
50g Egg Yolks
10g Sugar
2g Gelatin Sheets (Gold Bloom)

Heat the heavy cream on the stove, making sure not to burn the bottom. Mix together egg yolks and sugar. Temper your heavy cream into the egg mixture, 1/3 at the time. Once combined place back on the stove to heat up to 80c, then add in your hazelnut liqueur. In another bowl place your chocolate and cocoa butter and stir in the mixture and gelatin. Once the chocolate is blended smooth pour the cremeux into the larger mold. Do not place back in the freezer. Follow the assembly below.

secretstashofchocolate-3589

Assembly

Place the the inside ring of chocolate layers in the Cremeux (once it has cooled down but not set) making sure it creates an even base, you may have to fill more then you expect and then scrape off the excess. Place back a final time in the freezer to set. Prepare the glaze which you can find here (I swapped out the white chocolate for Dark Chocolate (Valrhona 66%), and black food coloring. When the glaze comes to temperature, take the whole cake out of the freezer. Place on a ring mold so the glaze can cover the entire cake. Use a sharp knife to clean up the bottom edge. Place on a cake tray and decorate. I also made some glassy hazelnuts dusted with gold and 23K edible leaf gold.

See you next time. Hungry Eyes Full Heart, Can’t Lose!

Tilslørte Bondepiker Entremet

I have long been wanting to create the latest craze of the Internet, Entremet. You may know them as the shiny cream cakes you see people post, with mirror like glaze. As it is fall season here in Seattle I wanted to take advantage of the great apples Washington has to offer. This is my take on a classic Norwegian dessert – Tilslørte Bondepiker. Traditionally it is layers of apple compote, whipped cream, and toasted breadcrumbs in butter. Inspired by Savour School in Australia I created my own Entremet staying true to the flavors of the original dessert, but also elevating it to the next level.

whatsapp-image-2016-11-13-at-21-37-59

Tilslørte Bondepiker

Apple Compote

2kg Honey Crisp Apples (Peeled and Cored)
50g Sugar
5g Malic Acid (Adjust to your level of tartness)
60ml Calvados

Cut the apples in to medium sized cubes and stew them down with sugar over medium-low heat until you get a jammy apple compote. Remove from heat and add Calvados and Malic Acid. There is going to be sweetness in other layers, so you really want to make the apple’s tartness come forward, but not a full lip-puckering tart. Allow to cool to room temperature. Using a cheese cloth, drain most of the excess water from the apples if there is any. This will ensure that you have a nice firm texture of apple. Create a 2-3mm even layer on a baking sheet and place in freezer.

Butter Biscuit

125g Butter
65g Sugar
2g Vanilla Extract
50g Egg
260g Pastry Flour
15g Milk
5g Baking Powder

Cream the butter and sugar together and add the egg, mix until well combined. Sift flour and baking powder over butter mixture. Add milk and stir until just combined. Bake at 180c for Crumble the biscuits and saute in the butter. You want the crumbs to become golden and crunchy. Create a 2-3mm even layer on a baking sheet and place in freezer. This layer can also be made as a granola to add a more rustic chew to the dessert.

Bourbon Caramel Sauce

175ml Sugar
60ml Water
240ml Heavy Cream
30ml Bourbon
10g Butter

Heat sugar and water in a pot over medium-high heat until it turns a nice amber color. Be careful as caramel goes quickly from amber to burnt if you are not paying attention. Pull pot away from the heat and add the heavy cream. Stir and put it back on to the heat but reduce the heat to medium-low. Once the caramel has thickened remove from the heat and carefully add the bourbon and butter. Stir and let cool. If you have a condiment bottle this is a practical to use for storing the caramel sauce.

Cinnamon Bourbon Custard

250g Heavy Cream
125g Whole Milk
115g Egg Yolk
50g Sugar
10g Toasted Cinnamon (ground)
5g Cinnamon (ground)
14g Gelatin (Powder)

In a pot on the stove whisk and heat all the ingredients, except for the gelatin, until it reaches about 80c. Make sure there is nothing burning on the bottom and the eggs doesn’t scramble. Stir constantly until the mixture is enough to coast the back of the spoon. Let the mixture cool to 65c and add the Gelatin while continue to whisk. Once it is cooled to room temperature place in a piping back and leave out until you are ready to pipe the molds for assembly.

whatsapp-image-2016-11-13-at-21-37-59-1

Assembly

To assemble use any mold you like. Silicon molds are awesome for this aspect and they come in many shapes and sizes. I used specifically a Silikomart ‘Stone’ mold. It creates nice curved edges and a create size for this dessert. Take your two baking sheets out of the freezer and use a cookie cutter to cut out pieces that will fit inside the mold you use. Make sure there a little room on the sides so that the layers of apple compote and biscuit crumbs before you encased in Cinnamon Custard. Easiest way I found was to pipe in the custard into the mold and take a stack of Apple Compote, Bourbon Caramel, and Butter Biscuit and gently press into the custard. Make sure they fill the mold completely and doesn’t overflow. Place back in the freezer to make them frozen solid. I used a glaze from Savour School to get that mirror shine finish. As the entremet is setting up make the glaze. It will need some time to cool to the correct pouring temperature. I split mine into two batches, so that I could create that green and red Apple look. Allow entremet to setup and defrost at room temperature before eating. I know it is hard to not eat them all, but worth the wait.

See you next time. Hungry Eyes Full Heart, Can’t Lose!